Running the Java connector
The example Java connectors are developed as Spring Boot applications. You can choose to run the connectors through a command prompt or through the Spring Boot Dashboard in VS Code.
Command prompt
In the project directory (where the mvnw file is), use the commands below to get your connector up and running.
There are two ways to go about this. We recommend using the run command, for the reasons detailed below.
Note: If you are using the VS Code terminal, your commands should start with .\mvnw instead of mvnw.
Run
The example Java connectors include a Spring Boot dependency that allows for automatic restarts whenever files on the classpath change.
Use the following command to start the connector in this mode and run it until you press Ctrl-C.
mvnw spring-boot:run
Start and stop
To start the connector application and return to the command prompt, use:
mvnw spring-boot:start
You will then need to stop the connector application manually using:
mvnw spring-boot:stop
Spring Boot Dashboard
To run your connector directly through the Spring Boot Dashboard in VS Code, ensure you have installed the Spring Boot Extension Pack, either via the Extensions menu in VS Code, or using this link. Then, with your project directory open in VS Code:
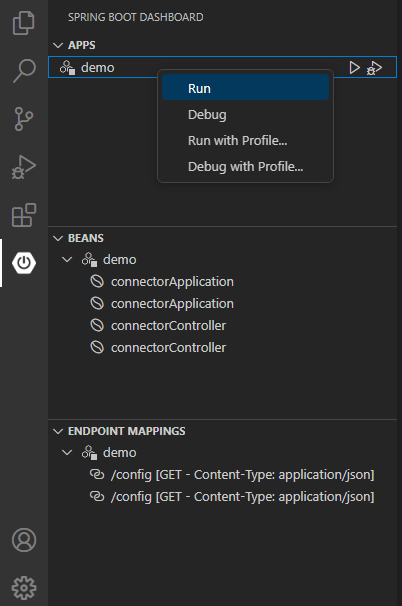
- Select the Spring Boot Dashboard panel icon in the VS Code Activity Bar.
- Under "Apps", right-click on the name of the app that you want to start and click Run.
- The resulting output in the debug console contains the URL for the connector.
The app automatically restarts whenever files are updated, which helps speed up the development/test cycle.
The screenshot below shows the Spring Boot Dashboard panel with the "demo" app appearing where you should expect to see it.